Setting Up and Managing Self-Serve Returns on Shopify Store
By Abhishek Sebin on

Managing returns can be challenging for Shopify store owners, especially as the business grows. Customers want a smooth and hassle-free process when they return products, and the more you can automate, the better. Setting up a Shopify return page with self-serve returns feature allows customers to handle their own returns. They need not rely on back-and-forth emails or wait on your support team for approval.
Not only does it create a smooth and engaging customer experience, but it also saves time for you and your team. Automating returns helps you focus on more critical aspects of your business while giving your customers a sense of control and convenience.
In this blog, we’ll walk you through everything you need to know about setting up and managing self-serve returns on your Shopify store. By the end, you’ll be well-equipped to offer a return process that enhances customer satisfaction and keeps your operations running smoothly.
Shopify's Self-Serve Returns Overview
Shopify's self-serve returns feature empowers customers to handle their return processes directly through the platform. These tools can be integrated directly into your store’s design, making it easy for buyers to request returns from a dedicated Shopify return page.
With this setup, customers can track their return status without needing to contact you directly. The system also ensures you have full control over the types of returns that are eligible, processing timelines, and more.
Key Features
- Customer portal access: Customers can manage their returns from their account page, where they can view all their orders and select items for return.
- Automated return authorization: Set up specific rules for return approvals and refund processing.
- Return label generation: Offer customers the ability to print their return labels directly.
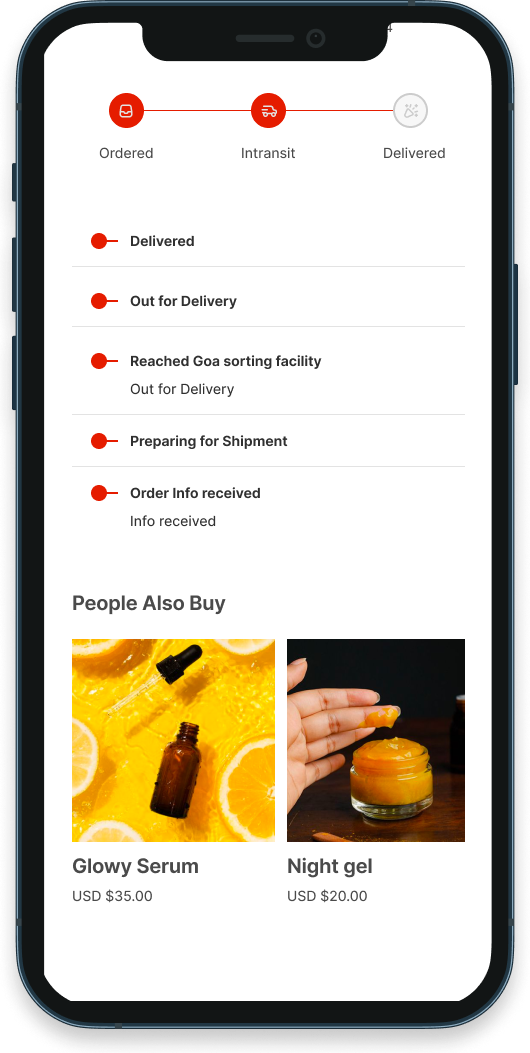
- Real-time tracking: Customers can track the status of their return through the Shopify return page.
- Exchange Management: Merchants can manage exchanges directly within the Shopify admin, allowing customers to swap items easily.
Looking to improve your post-purchase processes? PostShip provides unique features such as branded tracking pages and automated returns management. Postship integrates with Shopify's return functionality and enhances your online business and customer satisfaction.
Benefits of Self-Serve Returns
Setting up self-serve returns on your Shopify store doesn’t just make things easier for your customers; it also benefits you as a store owner. For customers, the return process becomes straightforward and easy. For store owners, this reduces the time spent responding to return queries and increases efficiency in managing returns. Let’s elaborate.
For Customers:
- Convenience: Customers can initiate returns at any time, eliminating the need to wait for business hours or navigate lengthy communication channels. This flexibility enhances their overall shopping experience.
- Empowerment: By allowing customers to manage their own returns, Shopify fosters a sense of autonomy. This empowerment leads to increased satisfaction as customers feel more in control of their purchases.
- Improved Transparency: Real-time updates on the status of returns help build trust between the customer and the brand. Knowing what to expect reduces anxiety associated with returns.
For Store Owners:
- Operational Efficiency: Automating the return process reduces manual workload, allowing merchants to focus on core business activities like product development and marketing. This efficiency can lead to cost savings and improved profitability.
- Data Insights: The self-service feature provides valuable data on return trends and customer behavior. Merchants can analyze this information to identify common return reasons and make informed decisions about inventory and product offerings.
- Increased Customer Loyalty: A smooth return process significantly enhances post-purchase satisfaction. PostShip offers an automated return management system that transforms order cancellations to order exchanges or store credits. Specific to small and medium online businesses, Postship’s intelligent returns management dashboard streamlines the entire return process to enhance efficiency and improve customer satisfaction.
By creating a Shopify return page and enabling self-serve returns, you give your customers the flexibility they need, which reflects positively on your brand.
Next, we’ll break down the steps required to activate self-serve returns within Shopify’s admin panel.
Activating and Self-Serve Returns in Shopify Admin
Enabling the self-serve returns feature on Shopify is relatively straightforward. Here’s a step-by-step guide to get you started:
Access Shopify Admin
Log in to your Shopify admin panel.
Enable Customer Accounts
- Navigate to Settings > Checkout.
- Under the "Customer accounts" section, select Accounts are required. This is necessary for customers to access self-serve returns.
Activate Self-Serve Returns
- Go to Settings > Orders.
- Find the option for Self-serve returns and enable it. This allows customers to submit return requests directly through their accounts.
Once you’ve activated the feature, the next step is to customize your return policies and rules to ensure they align with your store’s needs.
Configuring Return Rules and Policies
Establishing clear return rules and policies is essential for managing customer expectations and ensuring a smooth return process.
- How to create and define return rules
- Access Shopify Admin: Log in to your Shopify admin panel.
- Navigate to Policies: Go to Settings > Policies.
- Manage Return Rules: In the Return rules section, click on Manage.
- Define the Return Window: In the Return window section, select the duration (e.g., 30 days) that customers have to request a return after their order has been delivered.
- Set Return Shipping Costs: In the Return shipping cost section, choose how you want to handle return shipping fees. You can opt for a flat rate or specify that customers will cover their own return shipping costs.
- Specify Final Sale Items: In the Final sale items section, you can select specific collections or products that are not eligible for returns. This helps in managing exceptions effectively.
- Save Changes: After making all necessary adjustments, ensure you click Save to apply your return rules.
- To create a written return and refund policy
- From your Shopify admin, navigate back to Settings > Policies.
- Edit Return and Refund Policy: In the Written policies section, click on Return and Refund Policy.
- You can either enter your custom policy or click on Insert template to use Shopify’s default template.
- Customizing return policies to fit store needs
- Use the rich text editor to format your policy, add links, images, or any other relevant information.
- Review Your Policy: Ensure that all details are accurate and reflect your store's practices.
- Save Your Policy: Click Save to publish your return and refund policy.
Revolutionize your returns experience while boosting your profits with PostShip! Get customizable return policies mailed to you within minutes! Sign up for PostShip today!
With your return rules and policies in place, customizing notifications ensures customers stay informed throughout each stage of the return process.
Customize Notifications
Under Settings > Notifications, customize email notifications for both customers and your business regarding return requests.
- Editing Specific Email Templates
You can customize individual email templates that correspond to various stages of the return process. For example:
- Return Request Submitted: Notify customers when their return request has been received.
- Return Approved: Inform customers when their return request has been approved, including any instructions for returning the item.
- Return Rejected: Communicate reasons for rejection if applicable.
- Using Custom Variables
Incorporating custom variables into your notifications can enhance personalization. For instance, you might include:
- Customer names
- Order details
- Return instructions tailored to specific products
This personalization can make your communications feel more engaging and relevant to each customer.
- Automating Notifications
Consider automating notifications based on specific triggers during the return process. For example:
- Automatically send a confirmation email when a return request is submitted.
- Notify customers when their returned item has been received and processed.
- Utilizing automation ensures timely communication and reduces manual workload.
Platforms like PostShip lets you customize email notifications through integration with different apps like Klaviyo, which can enhance personalization in the communication process. It also automates notifications and gives you an insight into customer trends and behavior. Automate Your notifications & enhance profitability! Install Postship today!
Now that you’ve personalized and automated return notifications, it’s essential to verify that the self-serve returns process is functioning smoothly.
Test the process
It’s crucial to test the self-serve returns process in your Shopify store to ensure a smooth purchase for both customers and businesses. Below, we elaborate on how customers can initiate a return process.
- Return Process:
- Log In: Customers log into their account on your store.
- Access Orders: They view order history and select the order with the item they wish to return.
- Request a Return: Customers select eligible items, choose a reason from a dropdown, and submit the request.
- Receive Confirmation: An email confirms the return request, with further instructions if approved.
After setting up the self-serve returns and testing the functionality, it’s important to understand how to handle incoming return requests. Efficiently managing and reviewing return requests helps you stay organized and responsive to your customers' needs.
Review Return Requests
In your Shopify admin, go to the Orders section and look for the tab labeled Return Requests. Here, you can approve or decline requests as they come in.
- Evaluating Each Request
For each request, review the details provided by the customer, including:
- Order Number: Verify the order associated with the return.
- Items Returned: Check which items are being returned and their condition.
- Reason for Return: Assess the reason provided by the customer, which can help identify patterns or issues with specific products.
- Taking Action
- Approve or decline the return request based on your return policy and the information provided.
- Communicating with Customers
- After taking action, ensure that automated notifications are sent to customers regarding their request status. This includes confirmation of approval or denial, along with any next steps.
Don’t miss out on managing your returns efficiently. From organizing returned items to handling return shipping labels, you can take several key actions to ensure a smooth return process.
Manage Returns Efficiently
Upon approval of a return request, you can add exchange items, send shipping instructions, and provide return labels directly through Shopify.
- Streamlined Processing
Once a return is approved, manage it efficiently by organizing returns based on their status (e.g., awaiting shipment, received, processed). Use tags or filters in Shopify to categorize returns for easy tracking.
- Return Shipping Labels
If you provide prepaid return shipping labels, generate these directly within Shopify and send them to customers via email. This simplifies the process for customers and ensures they have clear instructions for returning items. - Inventory ManagementUpon receiving returned items, inspect them for quality and restock them in your inventory if they are in sellable condition. Update inventory levels in Shopify to reflect returned items accurately.
- Refund Processing
Process refunds promptly once returns are received and inspected. Navigate to the order in Shopify, select the items being refunded, and initiate the refund process through your payment gateway. - Data Analysis
Regularly analyze data related to returns (e.g., reasons for returns, frequency of returns per product). Use this information to identify trends that may require addressing, such as product quality issues or sizing discrepancies. Make informed decisions about inventory or product descriptions. - Customer Feedback Loop
Encourage customers to provide feedback on their return experience through follow-up emails or surveys. This feedback can help you refine your return process further and enhance overall customer satisfaction.
PostShip complements Shopify’s capabilities by providing a more integrated approach to handling returns, order tracking, and customer communications. Reduce support queries and transform 50% of returns into revenue with Postship’s smart returns management. Encourage exchanges or store credits, minimizing refund losses! Contact us to learn more.

While activating self-serve returns is simple, it’s crucial to consider key factors like customer account setup, policy clarity, and theme compatibility before you go live with this feature.
Let’s elaborate on some of the important points to ensure the smooth implementation of the Shopify self-serve returns feature.
Important Considerations Before Activation
Setting Up Customer Accounts for Returns
Steps to activate new customer accounts: Activating customer accounts is essential for streamlining the return process. Here’s how you can enable accounts for your Shopify store:
- Go to Settings > Checkout in your Shopify admin panel.
- Enable “Accounts are optional” or “Accounts are required” depending on your preference.
- Customize the account creation email to make it easy for customers to set up their accounts.
This ensures that customers can log in and manage their return requests directly from their account dashboard.
Managing customer access and return requests
Managing customer returns can be done directly within Shopify’s admin. Here are some tips for handling return requests:
- Monitor return requests daily: Keep an eye on return requests to ensure they are processed in a timely manner.
- Approve or reject returns: You can manually approve returns that don’t meet the automated rules you set up.
- Refund management: Issue refunds to the customer based on the method you specified (store credit, exchange, or cash).
These steps ensure that customer returns are handled quickly and effectively, maintaining a positive customer experience.
Return Policy Clarity
Clearly outline your return policy on your website, including details about eligible items, time frames for returns, and any fees associated with returns. This helps manage customer expectations and reduces confusion.
Theme Compatibility
Confirm that your current Shopify theme supports the self-serve returns feature. Themes that are not compatible may not display the necessary options for customers.
Testing Procedures
Before fully launching self-serve returns, conduct thorough testing of the entire process from a customer's perspective. This includes submitting a return request, receiving notifications, and processing refunds.
Analytics and Feedback Loop
Use analytics tools to track return reasons and patterns. Understanding why items are returned can help you make informed decisions about product offerings and improve customer satisfaction over time.
PostShip offers robust analytics to understand return patterns, which is instrumental in tailoring product offerings and improving customer service. Book a demo to learn more.
For additional help, Shopify offers a variety of online resources and community support, which can be invaluable for new store owners.
Let’s check what they are and how to explore them below.
Using Community Resources and Support
Exploring Tutorials and Guides Available Online
- Step-by-Step Video Tutorials
One of the most effective ways to learn about Shopify’s self-serve returns feature is through online video tutorials. For example, relying on credible YouTube tutorials walks users through the entire setup process, covering activation of the returns feature, configuration of return rules, and management of return requests from the admin dashboard. - Official Shopify Documentation
Shopify also provides extensive documentation that includes detailed guides on setting up self-serve returns. These resources explain how to enable the feature, manage return requests, and customize notifications for both customers and store owners. Following these official guidelines ensures that you’re adhering to best practices and utilizing all available functionalities.
For more information on the technicalities of setting up self-serve returns on Shopify, read this guide on Shopify Help Center: Setting up self-serve returns. - Blogs and Community Articles
Many e-commerce blogs offer insights and tips on optimizing the self-serve returns process. For instance, articles often highlight common scenarios and provide step-by-step instructions for both customers and business owners. This kind of content can help you anticipate challenges and prepare effective solutions.
Leverage Community Forums for Additional Support
- Engaging with the Shopify Community
The Shopify Community forums are a valuable resource where users share their experiences, ask questions, and offer solutions. By participating in discussions related to self-serve returns, you can gain insights from other store owners who have navigated similar challenges.
For example, you might find threads discussing specific configurations that worked well for others or troubleshooting tips for common issues. - Seeking Advice from Experienced Users
In community forums, you can post your own questions or seek advice on particular aspects of setting up self-serve returns. Engaging with experienced users can provide tailored advice based on real-world experiences.
For instance, if you're unsure how to set return policies effectively, other merchants may share their strategies that have led to improved customer satisfaction. - Learning from User Experiences
Reading through past discussions can also reveal common pitfalls and successful strategies employed by other Shopify users. This collective knowledge can help you avoid mistakes that others have made, ultimately saving time and enhancing your store’s return process.
Leveraging community resources can greatly simplify the process of setting up self-serve returns on Shopify, offering valuable insights and support.
With these strategies in mind, let's summarize and focus on optimizing your store's return experience.
Conclusion
Setting up a self-serve Shopify return page is an essential step toward improving customer satisfaction and operational efficiency. By enabling self-serve returns, you give your customers the ability to initiate returns on their own, which reduces manual workload and leads to faster resolutions. Configuring return rules and policies allows you to maintain control over the process while still offering flexibility to your customers.
Shopify’s built-in tools for managing returns, from automated approvals to real-time tracking, ensure a smooth experience for customers and merchants. Now that you understand the key benefits and steps involved, explore Shopify’s customization options to tailor the self-serve return process even further.
By leveraging tools like PostShip, you not only improve operational efficiency but also build customer loyalty, making returns an important part of your service offering. Your store’s return experience can make or break customer loyalty, so getting it right is crucial!
Streamline your order tracking and returns process with rules-based automation that improves the customer experience and reduces operational delays. PostShip simplifies order returns while converting them into revenue! Try PostShip's smart returns management today! Don’t lose money on returns anymore! The first 100 hundred orders are free! Schedule a demo now!